GE LOGIQ e
GE LOGIQ e User Guide


Here is a basic introduction to the GE LOGIQ e device.
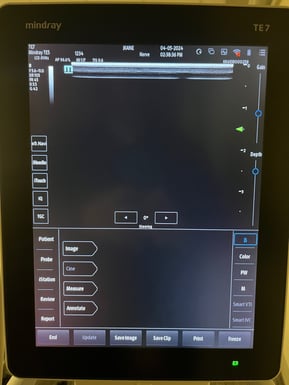
When the machine powers up, you should see this default home screen. From here you can select probes, enter patient information, or even immediately begin scanning.

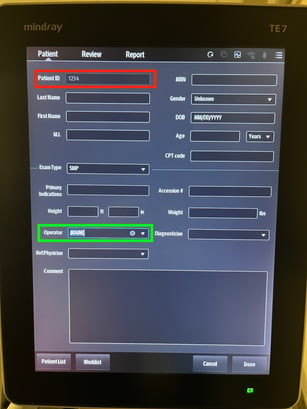
To properly begin a study, you will need to enter patient information. Do so by selecting the Patient button to get to the patient information screen. Here you can enter the patient's MRN (red box) as well as your user ID in the operator field (green box). If your device is equipped with a barcode scanner, please put the cursor into the MRN box and then scan that patient's barcode to pull in the patient information. Once you have entered the requisite information, click "Done" to proceed to your study.
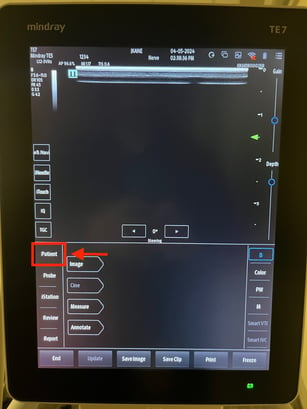

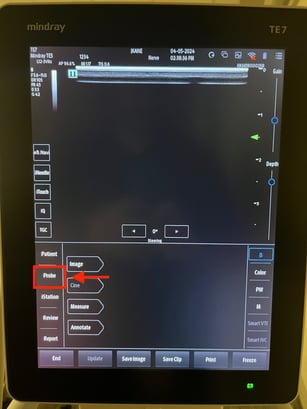
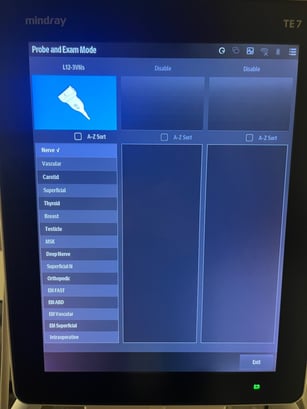
If needed, you can choose the correct probe and exam mode by selecting the "Probe" button and then choosing which probe and exam settings you would like to use from the list. It is important to choose the correct exam type as this optimizes the imaging parameters and loads the appropriate calculation packages.
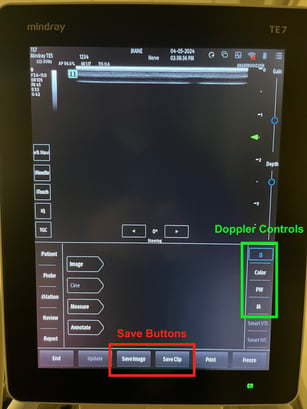
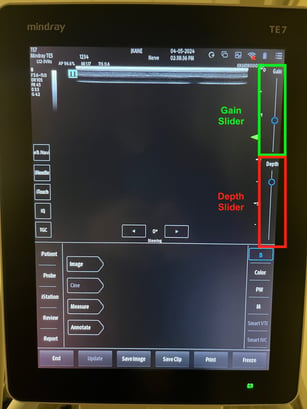
Once the patient information has been entered and the appropriate probe and exam type selected, you can proceed to image your patient. Please note the controls for saving stills and clips along the bottom. Doppler options and M mode are located to the right. Depth and gain are controlled by the sliders on the right side of the screen.
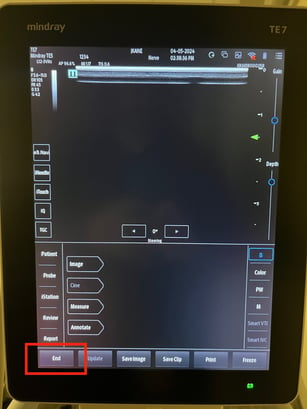
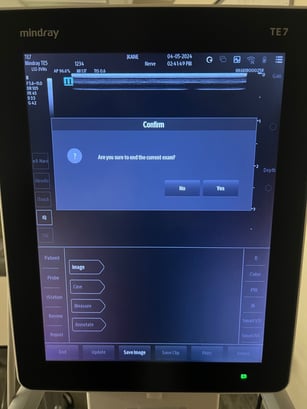
When you have completed your study, make sure to click "End" and confirm as this is what will close your study and instruct the machine to upload it to synchronicity. After ending a study, please return the machine to its home. Leave the machine powered on and plugged in - this will give it time to upload and archive studies to Synchronicity. Most machines have an auto-off feature and will turn themselves off after studies have uploaded.
