Samsung HS 60
Samsung HS60 User Guide
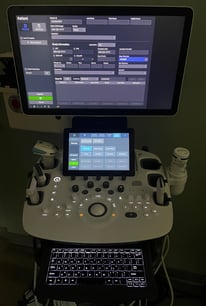
Here is a basic introduction to the Samsung HS 60 device.
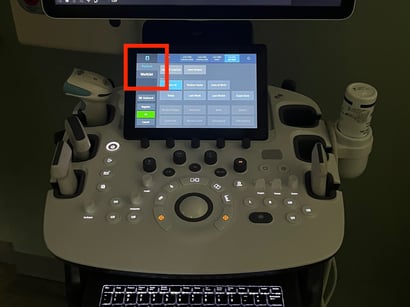
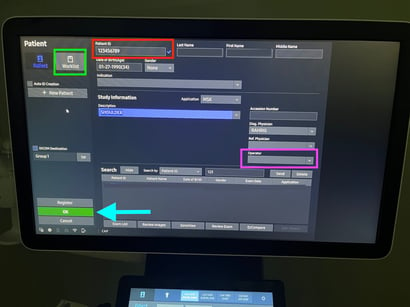
To properly begin a study, you will need to enter patient information. Do so by selecting the patient information button (red) on the touch screen to get to the patient information screen.

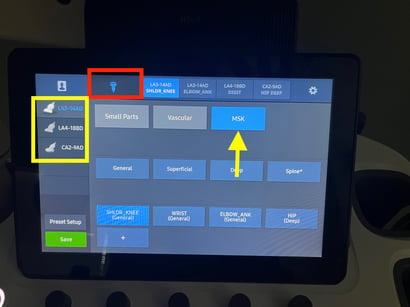
If needed, you can choose the correct probe and exam mode by selecting the "Probe" icon on the touch screen (red box). This will activate the probe selection mode and you can choose which probe you would like by pressing the corresponding button (yellow box) and selecting the exam type (yellow arrow).
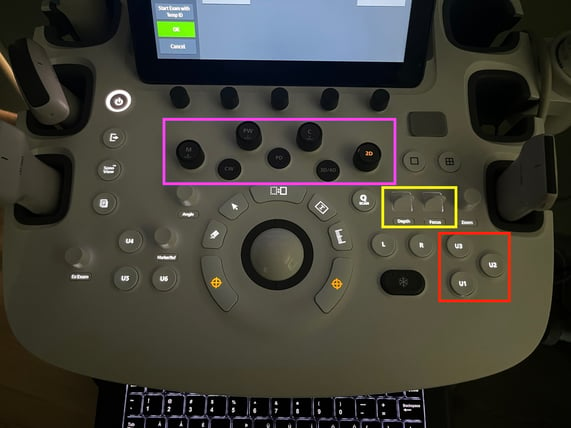
Once you have selected you probe you can perform your study. Each machine can be configured differently for how to save images, but usually the store image/clip function is assigned to the U1, U2, U3 buttons (red box). You can adjust the depth and focal zone using the toggles (yellow box). You can switch to doppler modes using the buttons above the track pad (magenta box). Rotating these buttons controls the gain.
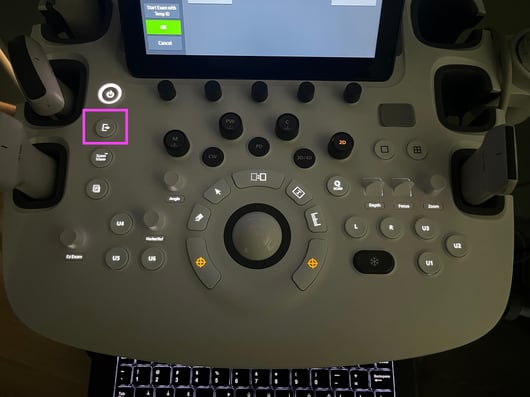
When you have completed your study, use "End Exam" button (magenta) to submit the study to storage and reset the patient information. This is what will close your study and instruct the machine to upload it to synchronicity. After ending a study, please return the machine to its home. Leave the machine powered on and plugged in - this will give it time to upload and archive studies to Synchronicity. Most machines have an auto-off feature and will turn themselves off after studies have uploaded.

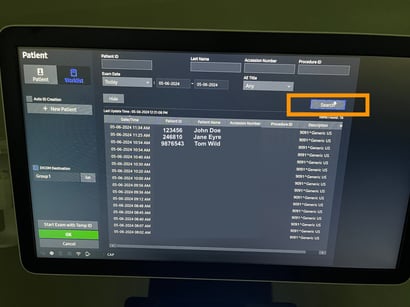

There are a few ways to enter patient information on this screen. If your machine is equipped with a barcode scanner you can proceed to scan the patient's sticker or wrist band to pull in relevant information. If this fails, or you do not have a sticker you can perform manual data entry. The first way is to type in the patient's MRN into the Patient ID field (red box) and to enter their name. Alternatively, you can pull their information from the worklist which should show all patients registered in the clinic for the day. To do so, click on Worklist (green box) which will bring you to the worklist query screen (right). On the worklist screen, if you click Search (orange box), the machine will pull in a list of patients and you can select the appropriate one.
Before beginning the exam, you will want to add your Cerner user ID to the study so that it associated with you in Synchronicity. On the patient information screen enter the your Cerner ID into the Operator field (magenta box). After this you can click on OK (blue arrow) to begin your study.
