SonoSite Edge II
SonoSite Edge II User Guide
Here is a basic user guide to the SonoSite Edge II machine.
When you turn on the machine, you will see either the patient information screen or the imaging mode as the default landing screen
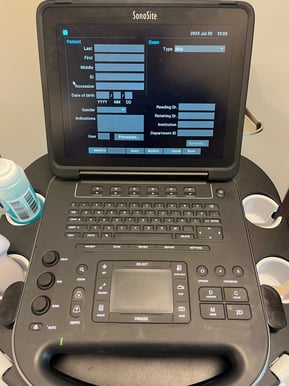

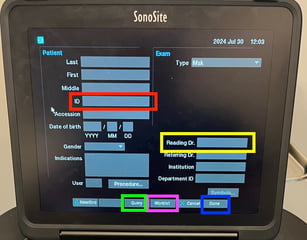
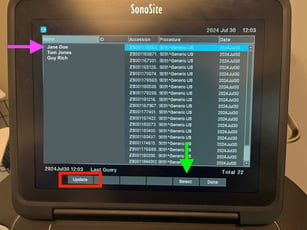
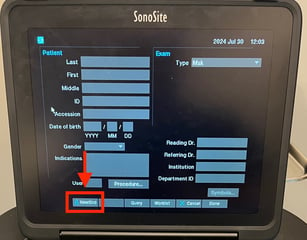
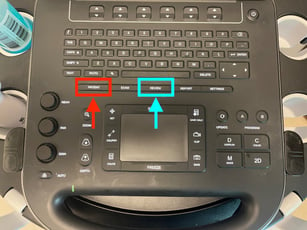
To properly begin a study, you will need to enter patient information. Do so by selecting the Patient button (red arrow, left) to get to the patient information screen. Here you can enter the patient's MRN (red box, middle). If your device is equipped with a barcode scanner, please put the cursor into the MRN box and then scan that patient's barcode to pull in the patient information. If you do not have a barcode scanner, you can type in the relevant patient information, use the query feature, or use the worklist feature to pull in information. To manually query the worklist, type in the MRN, and then press the Query button (green box, middle) to pull in the rest of the patient information. To select the patient from the worklist screen, press the Worklist button (magenta box, middle). On this screen push the Update button (red box, right), click on the appropriate patient from the list (magenta arrow, right), and then push Select (green arrow, right). Finally, add your user ID in the Reading Dr. field (yellow box, middle). Once you have entered the requisite information, click Done (blue box, middle) to proceed to your study.

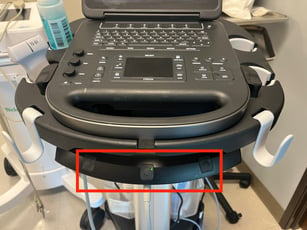
After entering patient information and pressing Done you will return to the scanning screen. From here you can begin your exam or change your transducer (if your machine is equipped with more than one probe). Depending on your machine's configuration, you may havre to manually exchange the probe on the device. Alternatively, some machines will be on a stand that allows you to choose the probe by pushing one of the black buttons on the device (red box)
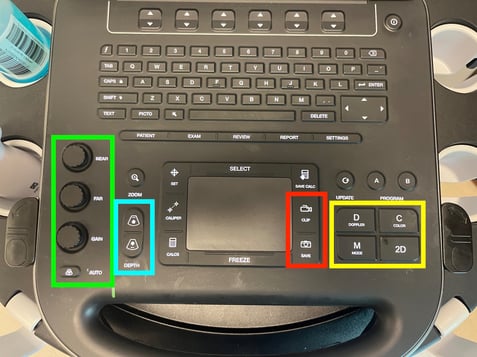
After choosing your probe you can complete your study. Please note the controls for saving stills and clips as represented by the Camera and Film buttons (red box). Doppler (C) and M mode are located to the right of the machine (yellow box). Gain is controlled by the knobs on the left side of the machine (green box) while depth is controlled by the buttons (cyan box).
To end your study and start the upload process, return to the Patient information screen by pressing Patient. Select New/End (red box, right) at the bottom of the screen to finalize the study and submit for upload. After ending a study, please return the machine to its home. Leave the machine powered on and plugged in - this will give it time to upload and archive studies to Synchronicity. Most machines have an auto-off feature and will turn themselves off after studies have uploaded
