SonoSite X-Porte
SonoSite X-Porte User Guide
Below you will find a basic introduction to the SonoSite PX machine. First is a video demonstration of the workflow and entering patient information. This is followed by a detailed step by step guide to using the machine.

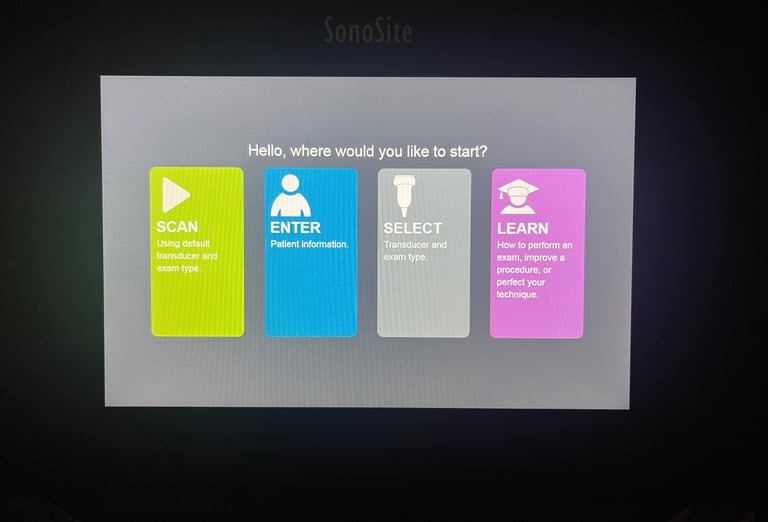
When the machine powers up, you should see this default home screen. From here you can select probes, choose to enter patient information, launch the on machine educational modules, or even immediately begin scanning.

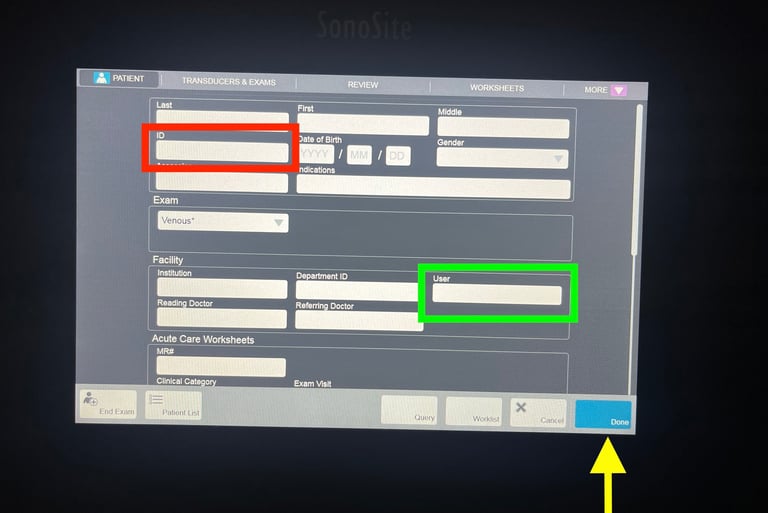
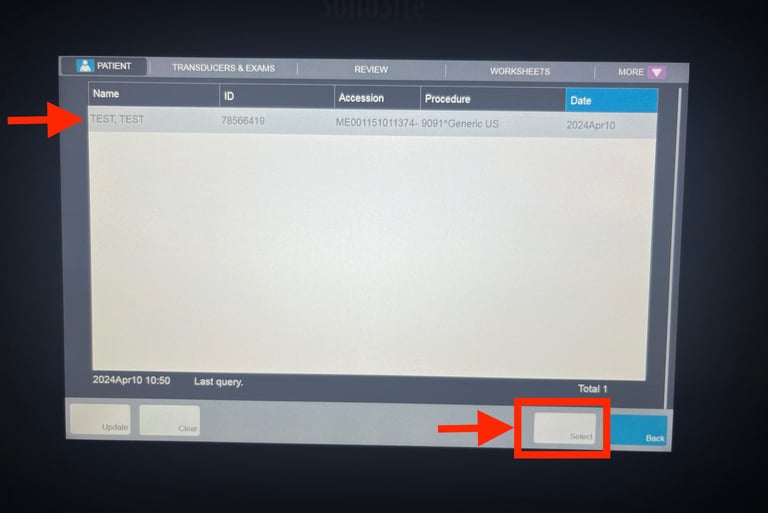
To properly begin a study, you will need to enter patient information. Do so by selecting the green Enter patient information button to get to the patient information screen. Here you can enter the patient's MRN (red box) as well as your user ID in the User field (green box). If your device is equipped with a barcode scanner, scan that patient's barcode to pull in the patient information. This will load the auto-query screen where you can tap on your patient from the worklist and then push Select. Once you have entered the requisite information, click Scan (yellow arrow) to proceed to your study.


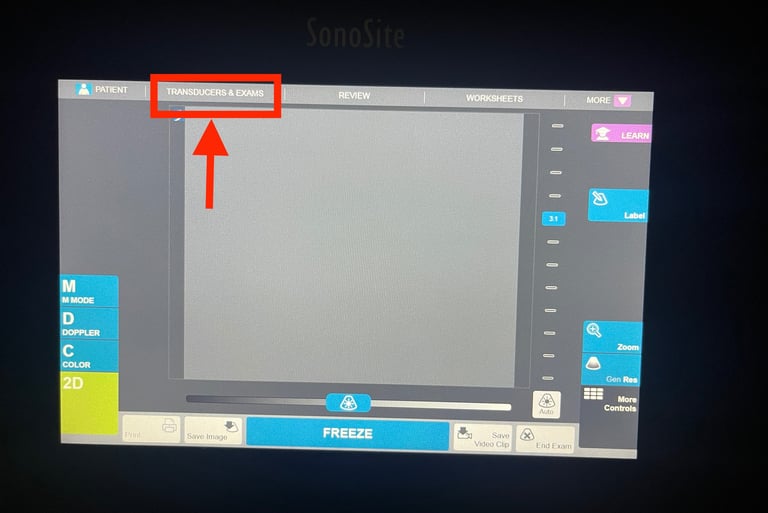
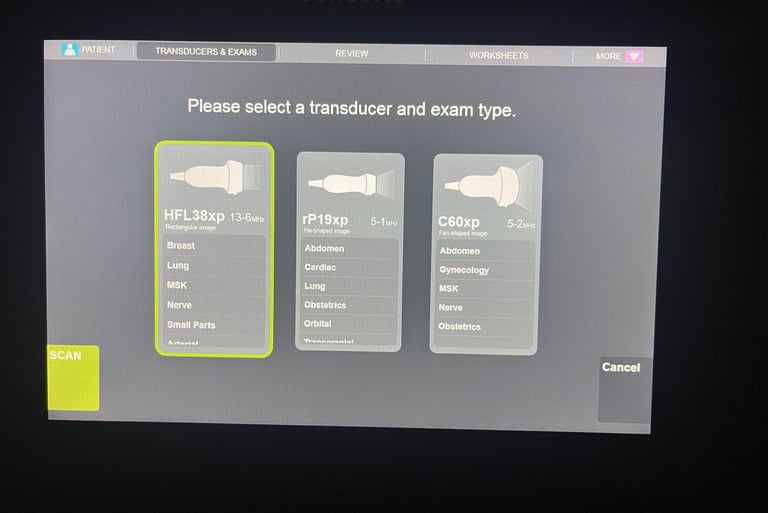
You may need to change your probe or exam type before scanning. This can be done by tapping on Transducers & Exams (red box) at theta of the screen. This can be done from the patient information screen or from the scanning screen. This will load the Probe/Exam selection screen. Please choose accordingly and tap Scan to continue to your study.
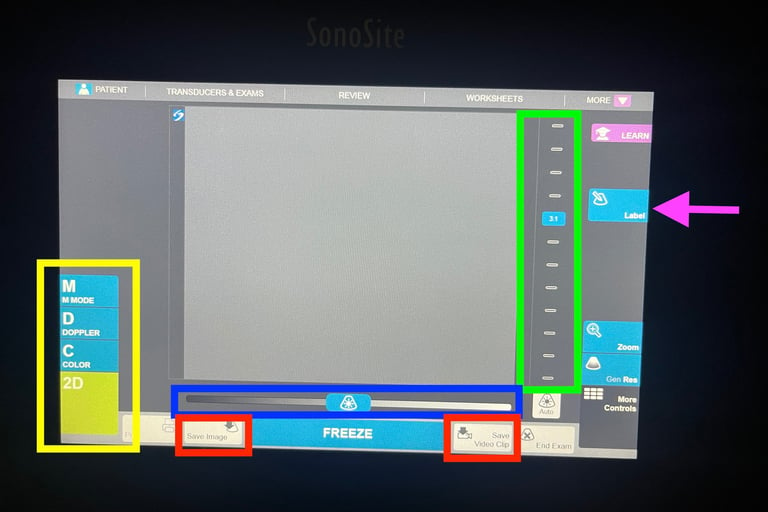
Once the patient information has been entered and the appropriate probe and exam type selected, you can proceed to image your patient. Please note the controls for freezing, saving stills, and saving clips at the bottom (red). Doppler options and M mode are located on the left of the screen (yellow). Depth (green) and gain (blue) are controlled by the sliders. Annotations can be made with the Label button (magenta arrow). The touch screen will also have additional options and setting you can configure depending on the exam type and context.

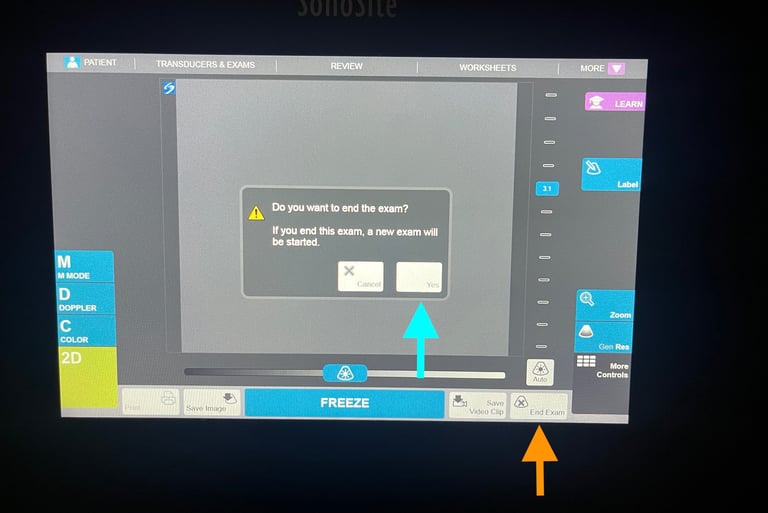
When you have completed your study, make sure to click End Exam in the bottom right corner (orange arrow). This will prompt you to confirm that you would like to end the study. Please do so by tapping Yes in the pop-up box (blue arrow). This will officially close your study and instruct the machine to upload it to synchronicity. After ending a study, please return the machine to its home. Leave the machine powered on and plugged in - this will give it time to upload and archive studies to Synchronicity. Most machines have an auto-off feature and will turn themselves off after studies have uploaded.
